![]()
![]()
![]()
« The vOICe Home Page
« The vOICe for Windows (introduction and download)
Advanced options: Once you have grown accustomed to the basic operation of The vOICe for Windows, you may wish to make use of some of the ``advanced options'' as referred to on the main The vOICe for Windows page, including
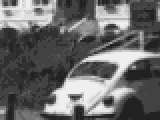
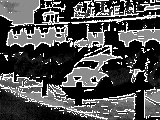
This option enlarges the middle part of the camera image just like a zoom lens would, but without requiring such a lens! F4 magnifies two times, Shift F4 four times, Control F4 eight times and Shift Control F4 sixteen times. (Be careful not to hit Alt F4 accidentally since this is the usual key combination to quit the program.)
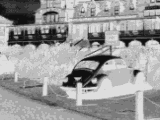
Normally, small dark objects on a bright background can be difficult to hear, but this option highlights objects in exactly this situation, by turning them into bright objects on a dark background.
Technical notes: in addition to this contrast enhancement feature, it can be useful to set a high video contrast via the menu Edit | Audio/Video Preferences | Video Source... | Contrast. The best choice may vary with brand and type of camera, but generally a high contrast makes it easier to discern the main items in a sonified image. With the Creative Labs Video Blaster WebCam I the maximum contrast value of 100 appeared to be a good choice. Also, to reduce video noise ("snow"), and thereby improve sound quality, one can either disable video compression altogether or choose a high compression quality (close to 100) from the Edit | Audio/Video Preferences | Video Source... | Capture Compression menu. There is a trade-off with CPU load, though, so completely turning the capture compression off may only work well on very fast PC's (200 MHz Pentium or better). A compression quality of about 70 may be a good compromise.
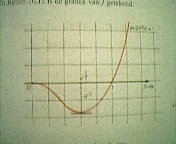
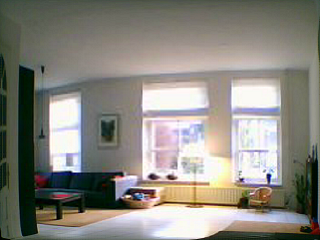
 This function allows The vOICe to be used as an auditory graphing calculator
in combination with a suitable screen reader. Of course you can also use the
camera to hear printed graphs, for instance
from a book.
This function allows The vOICe to be used as an auditory graphing calculator
in combination with a suitable screen reader. Of course you can also use the
camera to hear printed graphs, for instance
from a book.
![GUI area with negative video [and zoomed]](guicap.gif)
Full screen GUI sonification may also be used for access to VRML/X3D virtual worlds or to hear the scenery in modern 3D graphics games.
|
| |
| The quality of your color camera is decisive for good and accurate color sensing and identification, because camera color may deviate from the color perception of the sighted. Also make sure that you are using a 65,000 color (16-bit) or higher display mode, or else you will only get "grey" detection! |
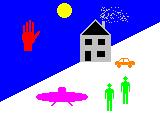 Any little green men?
|
 Shift+Alt+g for green
|
 Shift+Alt+r for red
|
Furthermore, you can make use of color filtering keys. Are you perhaps searching for little green men? You can detect and pick out items of a specified color by pressing the Shift-key and Alt-key in combination with the first letter of the desired color. For instance, Shift+Alt+g selects and sounds only green items, and Shift+Alt+r selects any red items. Other selectable colors are blue, cyan, yellow, orange and magenta. Pressing a color filter key combination for a second time toggles the color filtering off again ("white" filter). Moreover, pressing Shift+Alt+s toggles a built-in skin color detection mode that helps you locate faces and hands. Note though that other materials with skin-like colors, such as wood, may easily be mistaken for human skin.
Technical notes: the color sensor only supports "grey" detection in a 256 color (8-bit) screen display mode, so switch to a 65,000 color (16-bit) or higher display mode to get the full functionality: you may change these settings via Control Panel | Display | Settings. If this tab appears disabled, there probably was another tab installed for your particular graphics adapter. For instance, for a Matrox Millennium graphics card one should go to Control Panel | Display | MGA Settings to change the display mode.
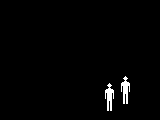
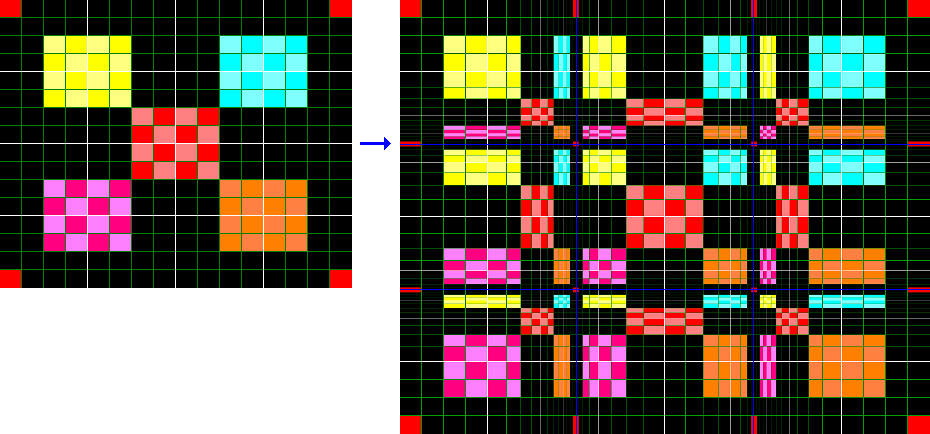
 The generated patterns can be used for exercising your conscious mental analysis:
what shapes (objects) do you hear at what positions? For simple patterns like the one
shown on the left this will even allow for training through self-study without tactile
or sighted reference feedback on correctness: your brain will build a self-consistent
map. Beware though that normal human beings, blind or sighted, have a very poor memory
for meaningless random patterns, so you should not expect to be able to mentally grasp the
positions of more than a few shapes or objects at a time from these soundscapes!
In the exercise mode, you can activate manual pattern updating by pressing the space bar.
The arrow keys will then move a shape, and the plus and minus keys on the numeric keypad
will select a shape. If desired, speech can be turned off via Alt F10.
The generated patterns can be used for exercising your conscious mental analysis:
what shapes (objects) do you hear at what positions? For simple patterns like the one
shown on the left this will even allow for training through self-study without tactile
or sighted reference feedback on correctness: your brain will build a self-consistent
map. Beware though that normal human beings, blind or sighted, have a very poor memory
for meaningless random patterns, so you should not expect to be able to mentally grasp the
positions of more than a few shapes or objects at a time from these soundscapes!
In the exercise mode, you can activate manual pattern updating by pressing the space bar.
The arrow keys will then move a shape, and the plus and minus keys on the numeric keypad
will select a shape. If desired, speech can be turned off via Alt F10. |
Further usage notes: with the default two bright rectangles of the exercise mode, you get two sound bursts, with duration depending on their width, pitch depending on their height and elevation, and loudness depending on brightness. Everytime you press the space bar, you get a new random size and position for two filled rectangles. Subsequently, you can move the currently selected shape around by using your arrow keys, and you can use the plus and minus keys on your numeric keyboard to select another shape to move around. The name of the next selected shape is spoken to you, although with default settings both are rectangles and you will only note which one is selected from the changes that you hear when you move the shape around with your arrow keys. The up and down arrow keys give corresponding pitch changes as the selected shape moves up and down, while the left and right arrow keys change the timing and stereo position of the shape's sound as this changes the horizontal position of the shape relative to any other shapes in the soundscape. This description may sound more complicated then it really is, so just try it and you'll soon find out. As stated before, instead of two filled rectangles, you can select many other combinations of shapes via the menu Edit | Exercise Preferences | Randomly Placed Shapes. You will need your screen reader to navigate this dialog. You can set the number of rectangles, circles, triangles and line segments. So by default you have 2 rectangles, 0 circles, 0 triangles and 0 line segments. If you are new to vision, hearing two shapes in one soundscape scan can still be a bit confusing, and it may then be advisable to first go back to sounding only one shape, and move that shape around with your arrow keys. Try that for various shapes of choice until you feel comfortable in understanding what you hear in the soundscapes. Subsequently change settings to get two shapes in a soundscape scan, and try telling which is which.
Another built-in exercise mode for practising the interpretation of soundscapes is the game of Tic-Tac-Toe activated by Shift F11.
 A settings menu (toggled by Shift Alt 4) enables correction for a camera view that is
often physically somewhat misaligned with the frame of camera glasses.
It lets you adjust the effective viewing direction through software.
The vOICe's foveal mapping has the additional property that horizontal and vertical
straight lines remain perfectly straight, thus limiting the inevitable distortion
associated with a foveal mapping. Unlike with for instance barrel distortion, an
upright rectangle remains a rectangle with straight edges no matter if the rectangle
appears in the foveal area, in the periphery, or in both.
A settings menu (toggled by Shift Alt 4) enables correction for a camera view that is
often physically somewhat misaligned with the frame of camera glasses.
It lets you adjust the effective viewing direction through software.
The vOICe's foveal mapping has the additional property that horizontal and vertical
straight lines remain perfectly straight, thus limiting the inevitable distortion
associated with a foveal mapping. Unlike with for instance barrel distortion, an
upright rectangle remains a rectangle with straight edges no matter if the rectangle
appears in the foveal area, in the periphery, or in both.

You need not worry if sounds appear to hiccup while saving the .avi file. This is a side-effect of the large CPU load, but it should normally not affect the sounds as stored in the .avi file: you should hear good results upon playback.
![]()


Individual video frames are stored in .bmp format, while individual soundscapes are stored in .wav format. Video frames can also be copied directly to the clipboard. A saved BMP image file may be imported into a suitable Braille printer or embosser to generate tactile graphics corresponding to the video image, for instance to provide tactile reference material for training purposes. You can even e-mail a live video snapshot and its soundscape directly via the integrated e-mail support of The vOICe.
Optionally, you can also install extension modules for MP3 and JPEG support:


The MP3 add-on option can be used for generating MP3 sound files, which are much smaller than WAV sound files. The JPEG add-on option is available for saving JPEG image files, which are generally much smaller than BMP image files.
![]()
In the table below, an overview is given of the main function keys and a number of keyboard shortcuts.
| Main function keys | Color filter keys |
|
F1: Motion detection F2: Mute Audio F3: Half speed F4: Zoom video two times F5: Negative video F6: Contrast enhancement F7: Edge enhancement F8: Function plot F9: Sonify GUI around mouse pointer F10: Say color F11: Exercise randomly placed shapes
Alt F1: Collision threats (hazard detection) Control F2: Mute and release audio device
Shift F3: Double speed
Shift F4: Zoom four times
Alt F9: Sonify active window Alt F10: No speech
Shift F11: Game of Tic Tac Toe |
Shift Alt r: Red Shift Alt g: Green Shift Alt b: Blue Shift Alt c: Cyan Shift Alt y: Yellow Shift Alt o: Orange Shift Alt m: Magenta Shift Alt s: Skin Shift Alt w: White (no filter) |
|
| ||
| JAWS for Windows | tested OK | |
| Thunder | tested OK | |
| eSpeak | not tested | |
| NVDA | not tested | |
| Hal | not tested
| |
|
| ||
|
Audio conflicts resulting in "audio hardware in use" type of error messages
should no longer occur when using Windows-2000 or Windows XP and later, which include
a generic low-level audio mixer for all sound cards.
These audio conflicts should also not occur when using The vOICe Learning
Edition with the Creative Labs SoundBlaster Live! sound card, which is capable
of mixing multiple sound streams at once. This works for users of Windows-95 and
later. Users of Windows-98 may check if their sound card has a WDM driver (WDM: Win32
Driver Model), which is Microsoft's software solution for the infamous audio conflicts.
The WDM driver for your sound card also transparently mixes audio streams from
different applications within the Kernel Mixer (KMixer).
Note that WDM drivers are not available for Windows-95, and that not all sound
cards for Windows-98 come with a WDM driver. If none of the above solutions are
available to you, the only remaining workarounds are the Control F2 key combination
to release the audio device or, alternatively, the use of multiple soundcards:
The vOICe for Windows allows you to select a specific sound card to use for
the soundscapes, so you could use one sound card for your screen reader and another
sound card for The vOICe for Windows.
| ||
Teaching and research options: Some special options are meant mainly for use by sighted vision teachers involved in developing a soundscape interpretation training program, or for use by people preparing a conference demonstration, or for use by investigators studying the limits of human perception under controlled conditions. The vOICe for Windows therefore includes for you:
 until a new image selection is cancelled to return to normal video processing.
Multiple images can be selected by the sighted with the Control-key in
combination with mouse clicks. However, keyboard-only control is also possible
by tabbing the selection dialog until the file list gets focus, and then keeping
the Control-key down while using the arrow keys to move among the files
and pressing the space bar to select or unselect image files.
until a new image selection is cancelled to return to normal video processing.
Multiple images can be selected by the sighted with the Control-key in
combination with mouse clicks. However, keyboard-only control is also possible
by tabbing the selection dialog until the file list gets focus, and then keeping
the Control-key down while using the arrow keys to move among the files
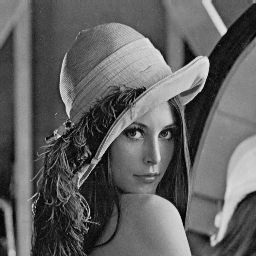
and pressing the space bar to select or unselect image files.Images stored on disk are insensitive to momentary lighting conditions or camera quality (video noise), they can be artificially created or edited, and they may thus be used to fully control and demonstrate various subtleties in soundscapes and soundscape perception. The example image shown on the left is one of the most famous standard images used in image processing research, known as the "Lena" or "Lenna" image. You can download this standard image in 256 × 256 pixel 256 grey-tone .bmp format for use with The vOICe for Windows by clicking the image on the left. Of course one can apply all kinds of image processing to this and other images and then load the processed variants into The vOICe for Windows in order to further explore the effects of various image enhancement algorithms on auditory perception.
|
|
|
Head-mount:
It is strongly recommended to use a head-mounted camera rather than a
hand-held camera, in order to have a more stable camera viewing
direction, at the very least until you have learnt to properly reorient the camera
based on the image sounds only. Learning good posture and gait can be another issue.
As a cheap home-made provisional solution, you could strap or tape the camera to your
stereo headphones, or to a cheap bicycle helmet. Later on, with more experience,
you might switch to hand-held usage if preferred, e.g., for reasons of
appearance - although the small camera may also easily be ``hidden''
in a hat of your preference. A little creativity can work miracles here. |
|
Ventilation:
In carrying the battery-powered notebook inside a shoulder-bag, make
sure that the notebook won't get overheated, for instance by adding
small spacers between the notebook and the shoulder-bag for sufficient
ventilation. |
|
Loudness:
Don't set the sound volume too loud! Generally, perhaps against
your own intuition, you can actually hear more detail at modest
sound levels. Moreover, the sounds are less unpleasant when
kept at a modest level, and you avoid any risk of hearing
damage. |
|
Sunlight:
Don't point the camera towards the sun! Direct sunlight will
most likely damage the sensitive image sensor inside your camera. |
|
CD-ROM tray:
The CD-ROM drive tray will remain locked against inadvertent
opening while The vOICe is running (Windows-NT and later). This
is to prevent the drive from bumping open while The vOICe is
running inside a backpack. If necessary, the drive door can still
be unlocked while The vOICe is running through keyboard shortcut
Alt U. |
|
Auto-start:
If you wish to have The vOICe automatically start when starting Windows,
you can arrange this by adding a shortcut to the executable voice.exe
in your C:\Windows\Start Menu\Programs\StartUp\ folder. |
|
Speed:
If the speed of your computer is insufficient, setting the
Video Format to a low resolution like 128 × 96 helps
to reduce the CPU load. Similarly, a 22 kHz sample frequency
(already the default) gives a significantly lower CPU load than
the 44 kHz CD quality Audio Format, and the PWL B-spline time window
type (also default) gives a significantly lower CPU load than the
QVD B-spline time window in the Soundscape Preferences. Compression
quality in the Edit | Audio/Video Preferences | Video Source... | Capture
Compression menu also affects CPU load. Use Control F1 instead
of Shift F1 to restore audio settings for a lower CPU load. |
|
Suspend mode:
In using a notebook PC, you may wish to change the BIOS setup settings,
such that closing the cover will not enter the "Suspend"
mode, but only turn the screen off. Otherwise, The vOICe software
might stop running when you close the cover of the notebook to carry it
around. The details of changing the BIOS setup settings during startup
generally differ with computer brand and BIOS version, but for the
Phoenix NoteBIOS 4.0 Setup, one should go to the "Power" menu and
change the entry behind "Cover close:" to "Video Off" - instead of
the other "Suspend" or "CRT Display" options. Again, ask your
computer dealer or a knowledgeable friend for advice or assistance,
if necessary. |
|
See also the Frequently Asked Questions page.
|